IntegraStone installation guide

A visual guide on how to build an IntegraStone deck from start to finish
Step 1:Apply ledger
Apply builders wrap on area where you are going to attach the angle iron ledger. Next find the location of the studs in the building to properly secure the lags bolts into. Pre-drill holes in ledger where studs are located. Make sure that the ledger is level and then screw lag bolts in. Don't screw lag bolts in all the way. Leave 1/8 " gap behind the ledger and place a plastic spacer on the back side of the ledger. Once spacer is behind, tighten the lag bolts.
Tools required for this step: 1/2" drill, impact gun and level
Step 2:Drill screw piles
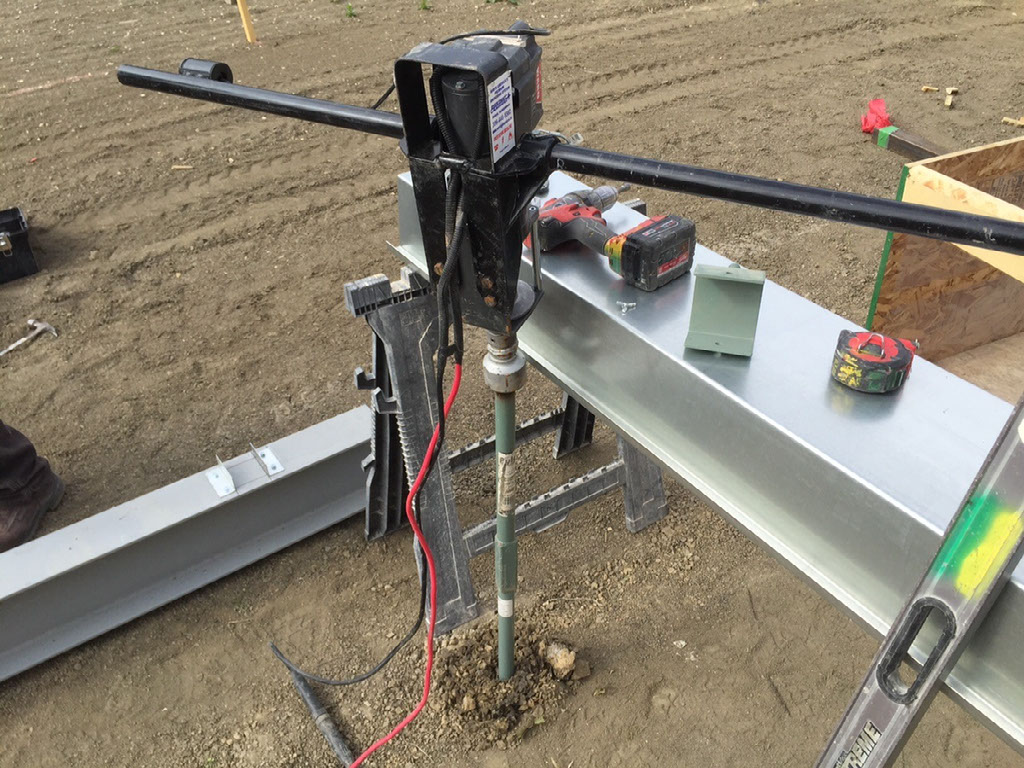
Note: This step is pertinent if piles have not been drilled. Before you drill in the screw piles have the underground lines checked and clearly marked. Using a pile driver screw piles into ground. The number of screw piles will vary depending on the job and engineering. The pile driver brand that we use is called Evertight Anchors.
Tools required for this step: Screw pile driver and level
Step 3:Create slope away from building

Creating slope away from the building is important. IntegraStone decks are waterproof so they need 1-2% slope away from the building.
Tools required for this step: 4 ft level
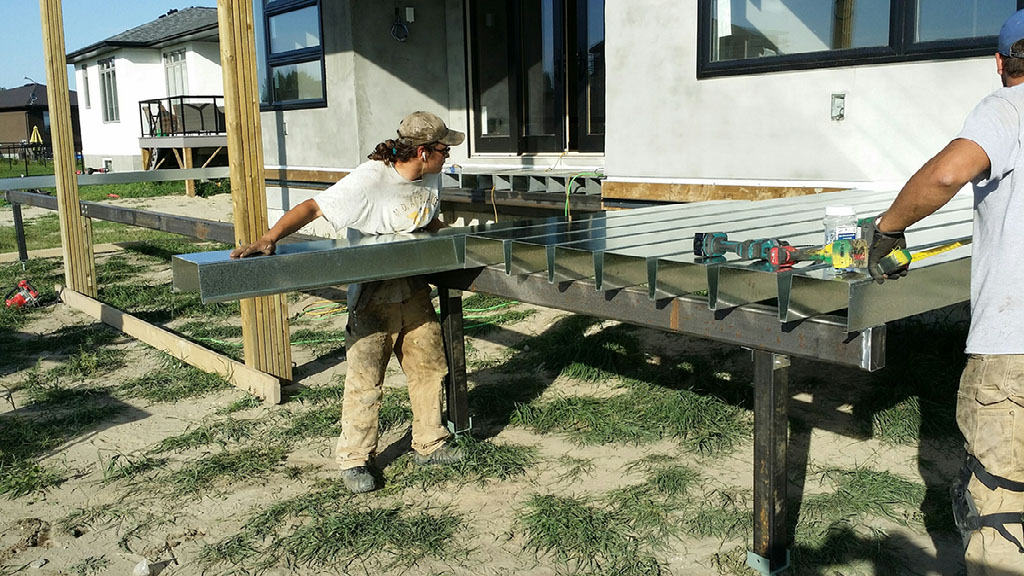
Step 4:Measure and cut columns
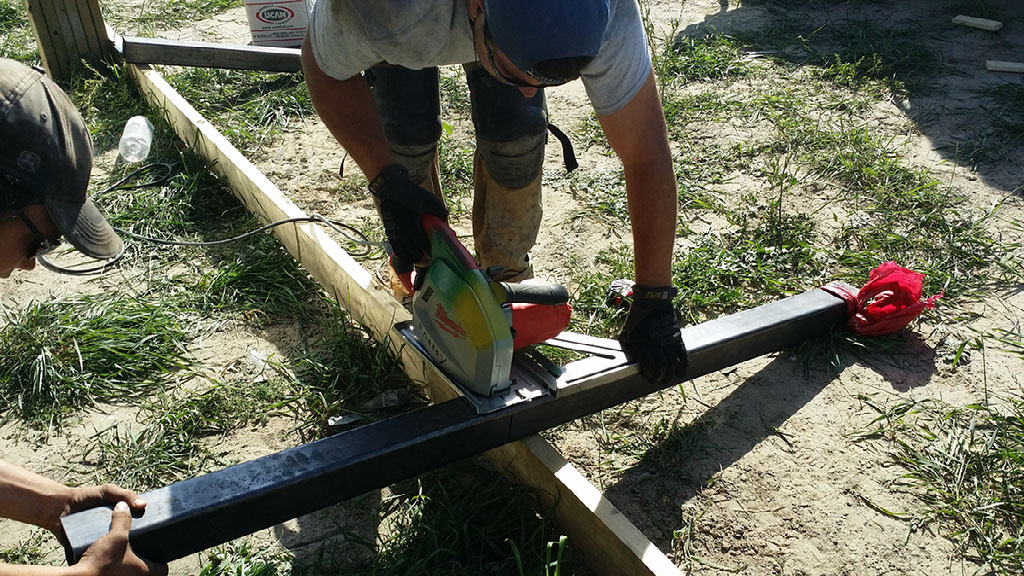
Using a laser level, find the ledger height and then take the measurement from the top of the pile cap to the height of the laser level and subtract the thickness of the beam and 1-2% grade. This will be the length of the column. Do this with each column as each will vary. If you don't have a laser level, secure a steel box joist on one end of the ledger. Temporally support the other end of the box joist to level measurement. Take the measurement from the pile cap to the bottom of the level box joist and subtract the thickness of the beam as well as a 1-2% grade slope. This measurement will be the column length. Do this with each column.
Tools required for this step: Tape measure, metal circular cold cutting saw and builders speed square.
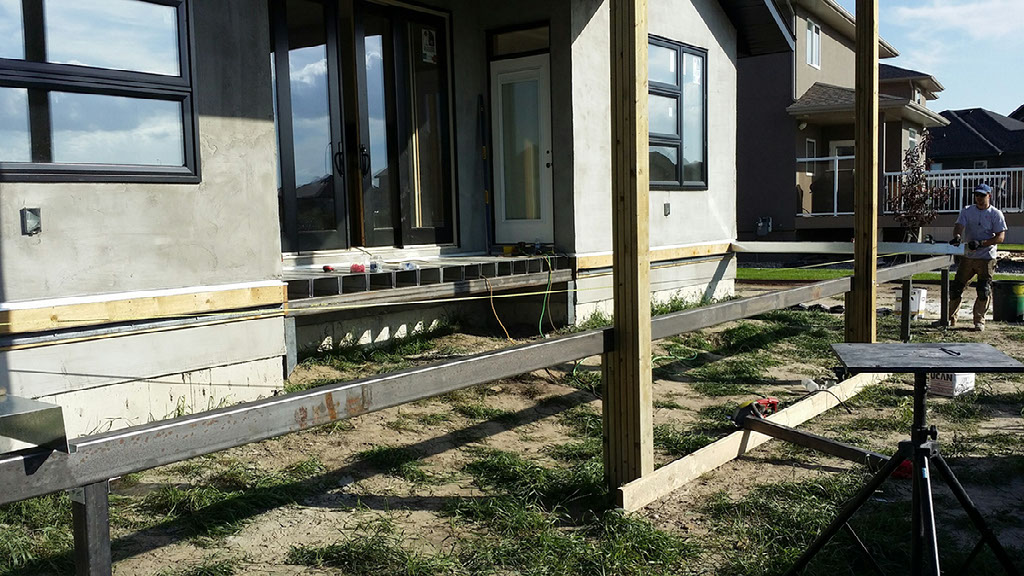
Step 5:Level bEam

Adjust the height of the screw piles and then set vertical columns onto pile caps. Stabilize the vertical columns and set beam on top. Lay the outside beam onto the vertical columns.
Tools required for this step: 4 ft level and C-clamps
Step 6:Vertical columns and beam
Screw the column brackets to the top and bottom of the vertical column into the pile cap and beam. Make sure not to over tighten Hex screws or they will snap off.
Tools required for this step: 1/2" drill, impact driver, C-clamps and level
Step 7:Square the deck
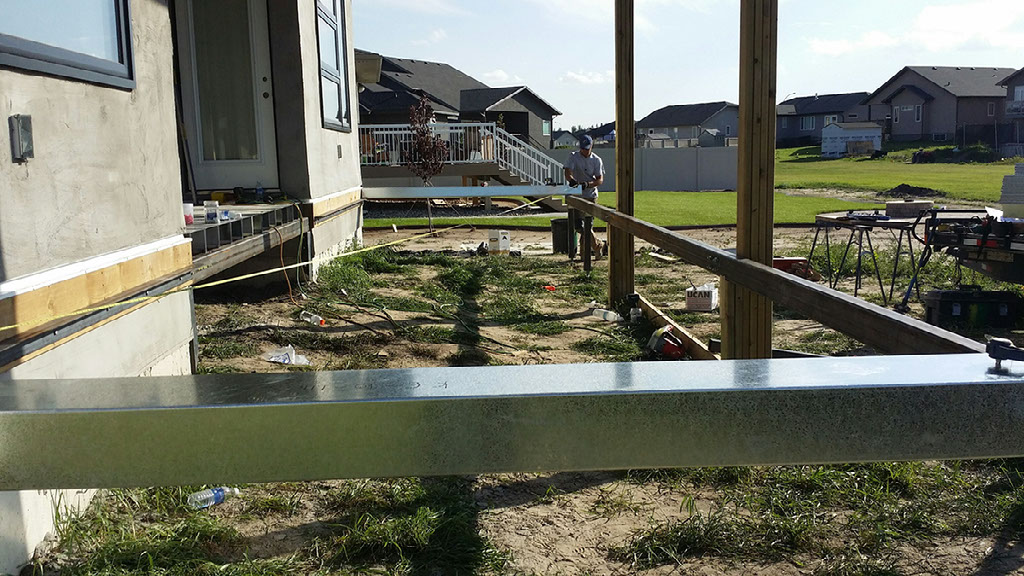
Once the beam is levelled lay a box joist at each end of the deck. Square these two box joists with each other. Make sure that you have a perfect parallelogram. Once you have the two ends parallel with each other, fasten them to the ledger and outside beam.
Tools required for this step: 25 and 50 ft metal tape measure, 1/2" drill and impact driver and laser square (optional)
Step 8:Placing box joists
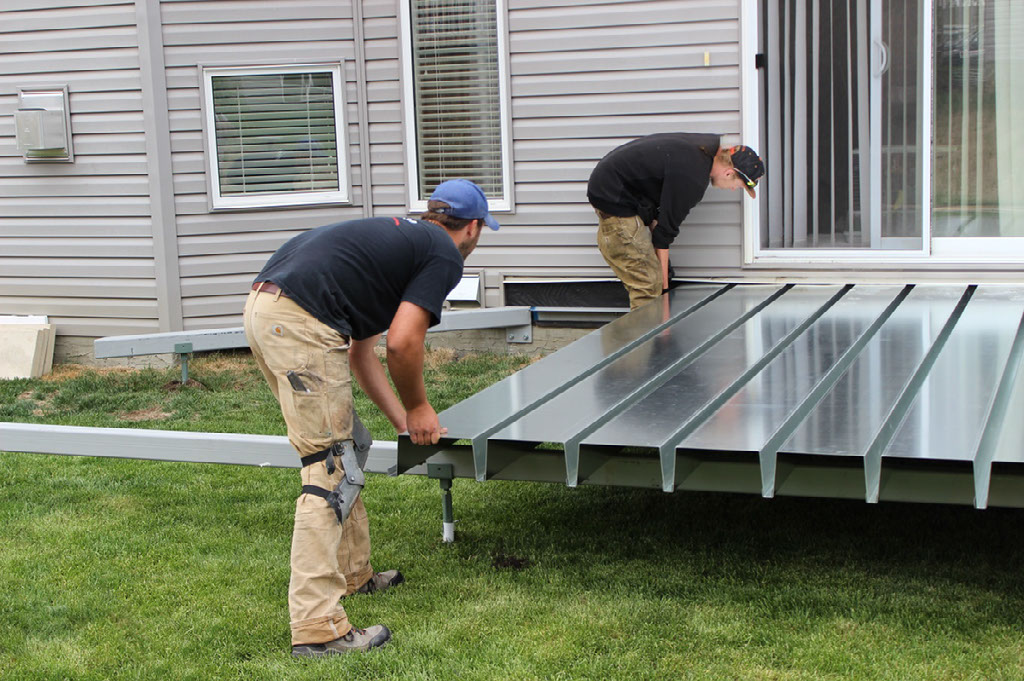
Now that the two ends are fastened. Mark out every 12" on the ledger and outside beam. Lay the rest of the box joists in between the ends and on the lines marked out. The box joist will fit inside the previous box joist. Using a string line attached to the secured ends and adjust the remaining box joists to match the string line.
Step 9:Screw box joists to ledger and bEam
Now that the deck is square. Screw the box joists down to the ledger and the outside beam. Pre-drill on the ledger and beam using 7/32" metal drill bit and drill bit extension. Screw box joists down using #14 (1") Hex self tapping screws.
Tools required for this step: 1/2" drill, impact drill, 6" bit extension and Hex head bit
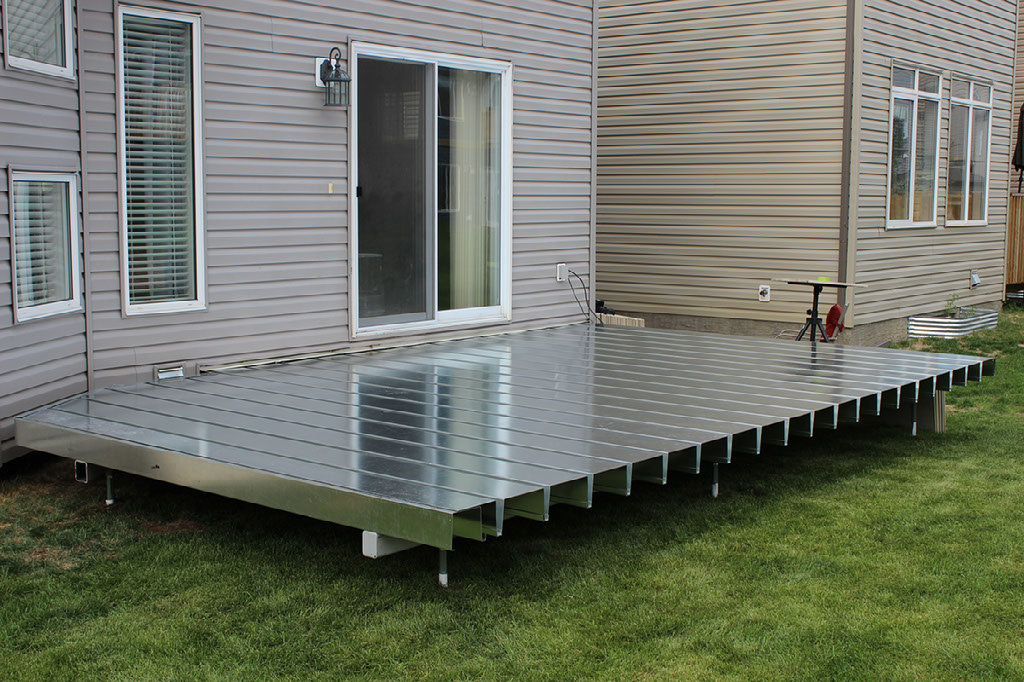
Step 10:Finished steel deck
Step 11:Laying out tile
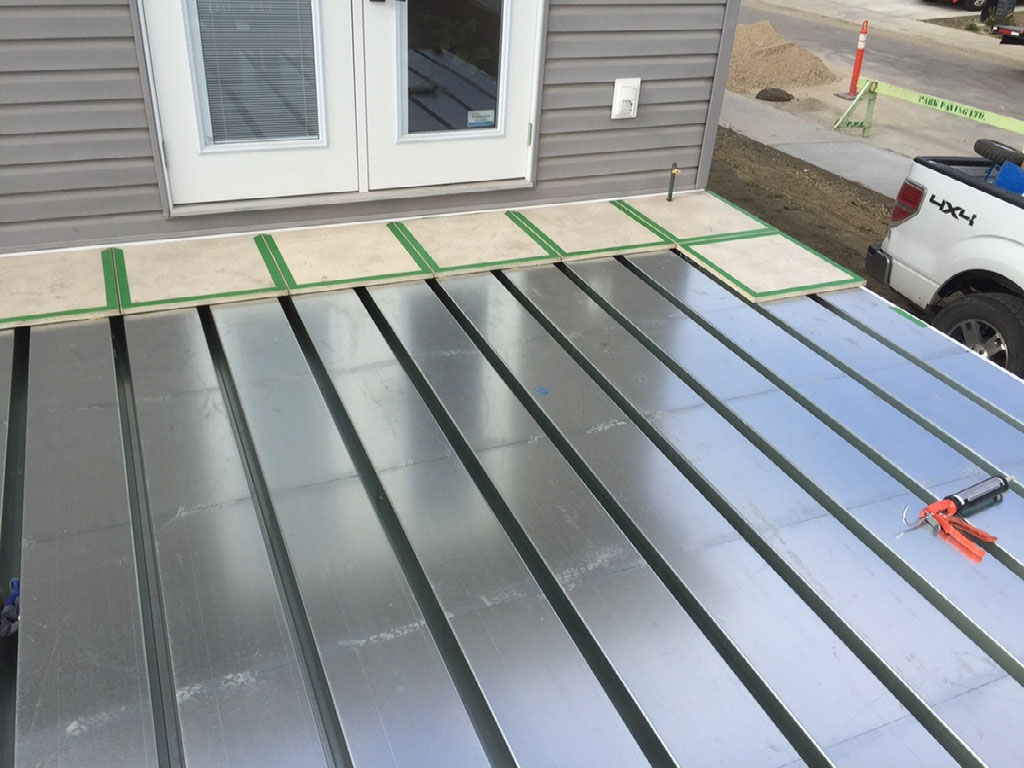
Once the steel deck is built you need to chalk the lines for tile layout. Measure and mark a line from the outer edge of the deck towards the building using a permanent marker. Measure and mark a line perpendicular from the first mark. Then using these two lines square the tile layout. Once the square has been established measure and mark every 2 ft parallel from the front edge and measure every 2 ft perpendicular from the front lines. Once lines are marked and chalked spray clear spray paint over the chalk lines to prevent lines from rubbing off.
Tools required for this step: laser square (optional), 25 ft tape measure, chalk line, clear spray paint and permanent marker.
Step 12:Cutting tile
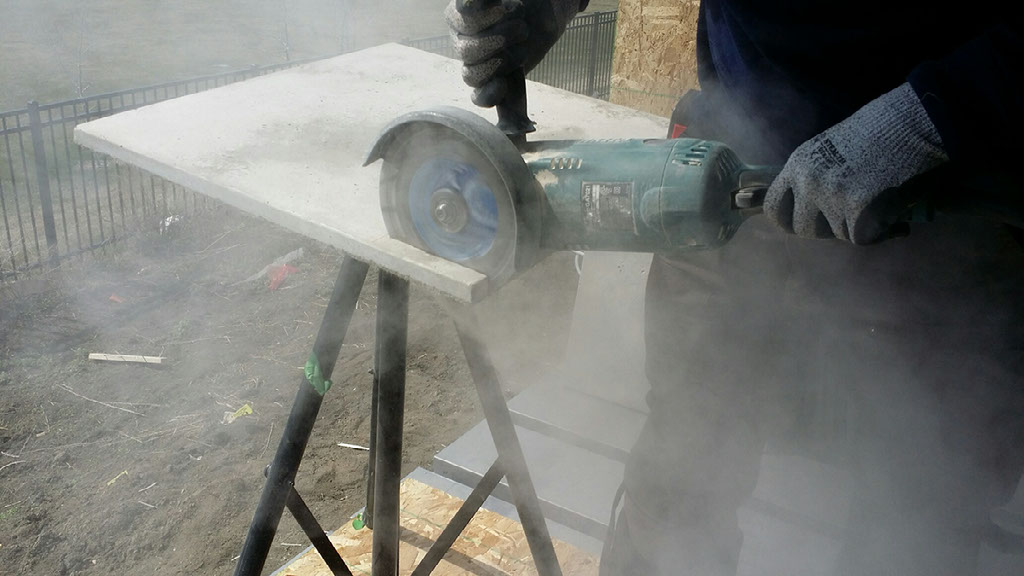
In most installations jobs you will need to cut the tile. This can be done using a 7" angle grinder with a diamond masonry blade.
Tools required for this step: 7" angle grinder, diamond masonry blade, dust mask, safety goggles and ear plugs. Note: tiles can be cut with wet tile saw.
Step 13:Taping tile
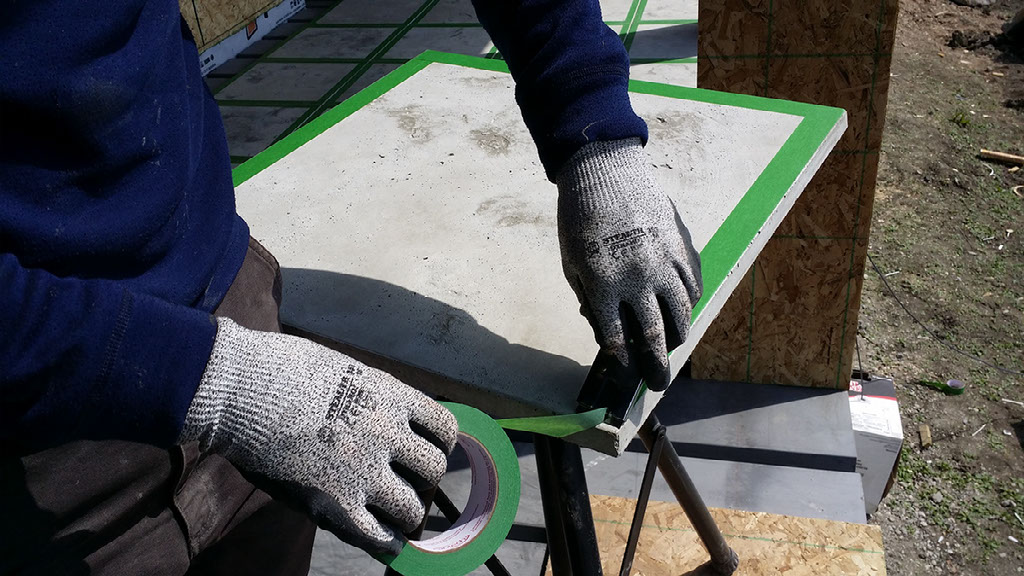
Before you begin laying down the tile down, tape all four edges of the tile. Make sure that tape is firmly pressed onto the tile and as close to the edge of the tile as possible.
Tools required for this step: utility knife and tape
Step 14:Shimming tile
In most cases you will need to dry fit the tiles to make sure that there is no variance in tile heights. Layout the row of tiles you're going to glue and inspect each one to make sure there is minimal height variance on all four sides. Shims come in 1/16" and 1/8" sizes. Once the necessary tiles have been shimmed you can now glue down tiles.
Tools required for this step: plastic shims
Step 15:Gluing down tile
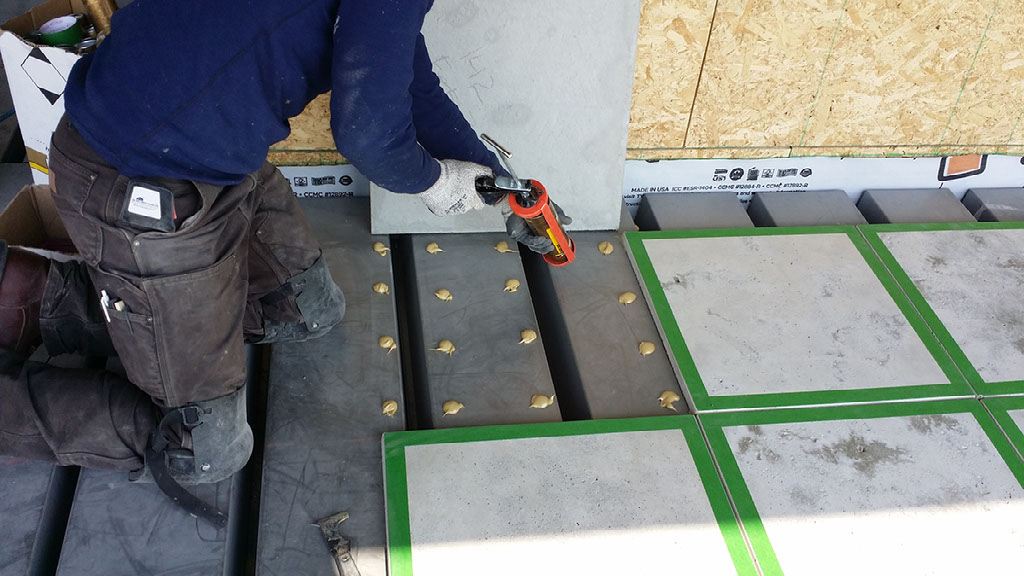
Now that the tiles are tapped, lines are chalked and tiles shimmed you can begin to glue tile down to the steel deck. Make sure to wipe the surface from dust and debris. Glue will not bond if the surface is dirty. Place 16 dabs of glue with the 24"x24" square. The glue will act as a platform creating an air gap between the tile and the steel so that water will not sit under the tile. Once the 16 dabs of glue are down, place the tile down on the glue. Press lightly down on all four corners of the tile to make sure the tile is completely bonded to the steel.
Tools required for this step: large caulking gun (825ml)
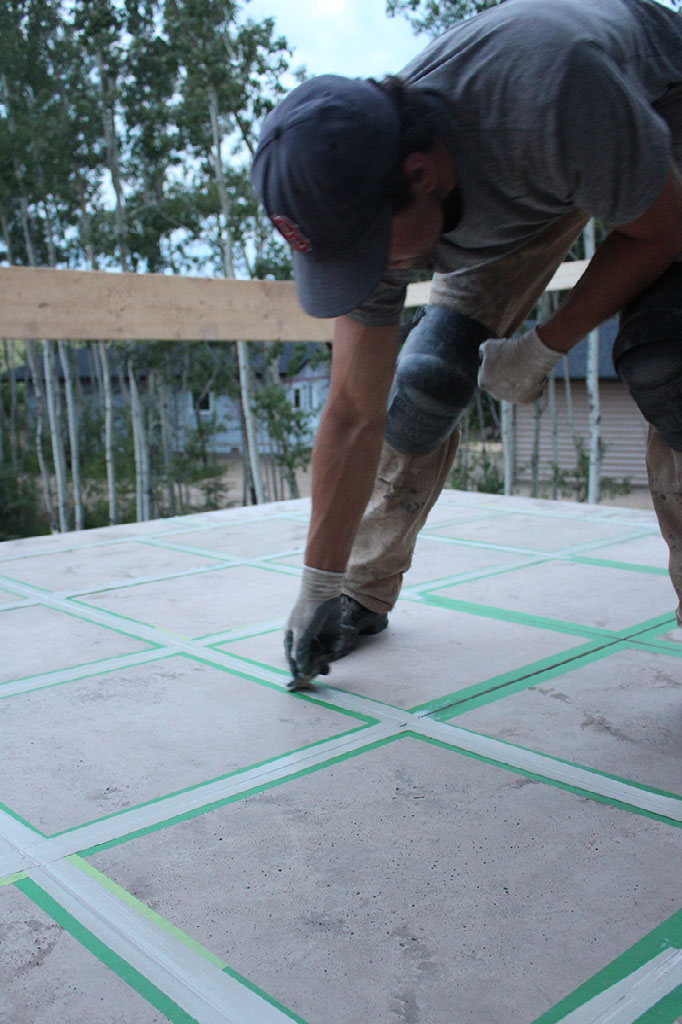
Step 16:Caulking joints
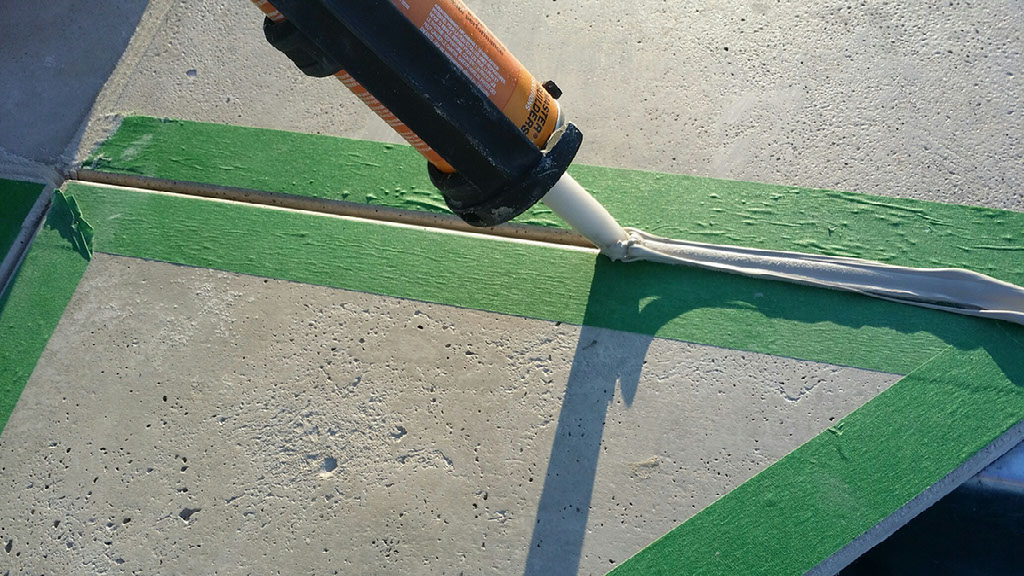
Wait 24 hours after gluing tile down before you can caulk the joints. Once cured the caulking can be applied in between tile joints. Make sure that the caulking is pushed all the way into the joint.
Tools required for this step: small caulking gun (300 ml mechanical or electric)
Step 17:Tool in caulking
After the caulking has been applied, use rubber tool to press excess caulking down into the joints. Make sure that you apply lots of pressure when tooling caulking in to ensure complete bond of the tile and caulking. It's imperative to get a good seal against both side of the joint. This will ensure that the joints are waterproof.
Tools required for this step: rubber tool
Step 18:Apply silica sand and remove tape
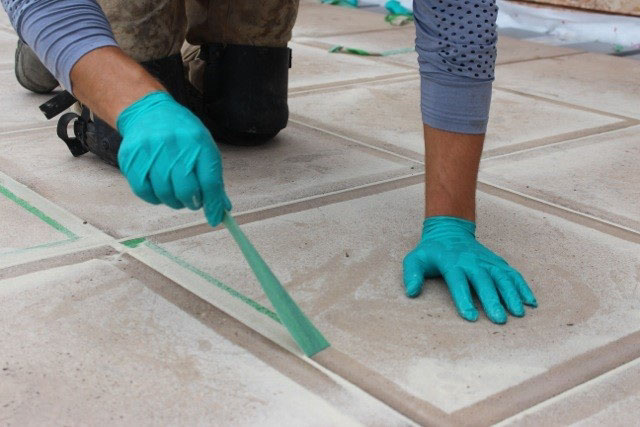
Apply the silica sand on the joints. After sanding remove the tape from the four sides of the tile and lightly rub sand into joints with your hands.
24 hour cure time
The chaulking takes 24 hours to fully cure. Once cured the deck can be swept off.
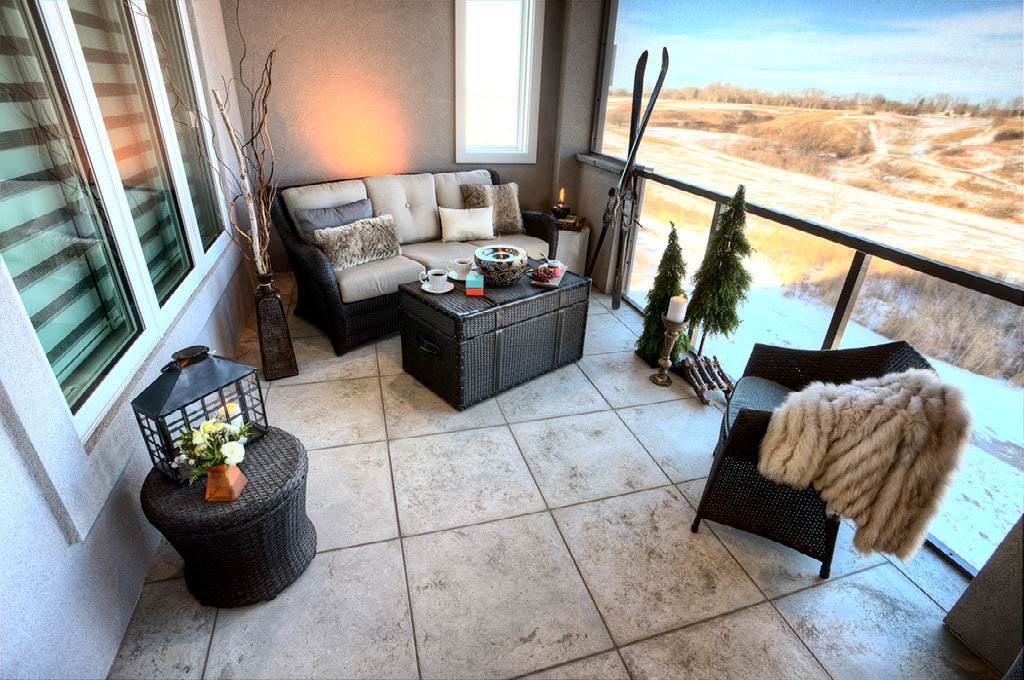
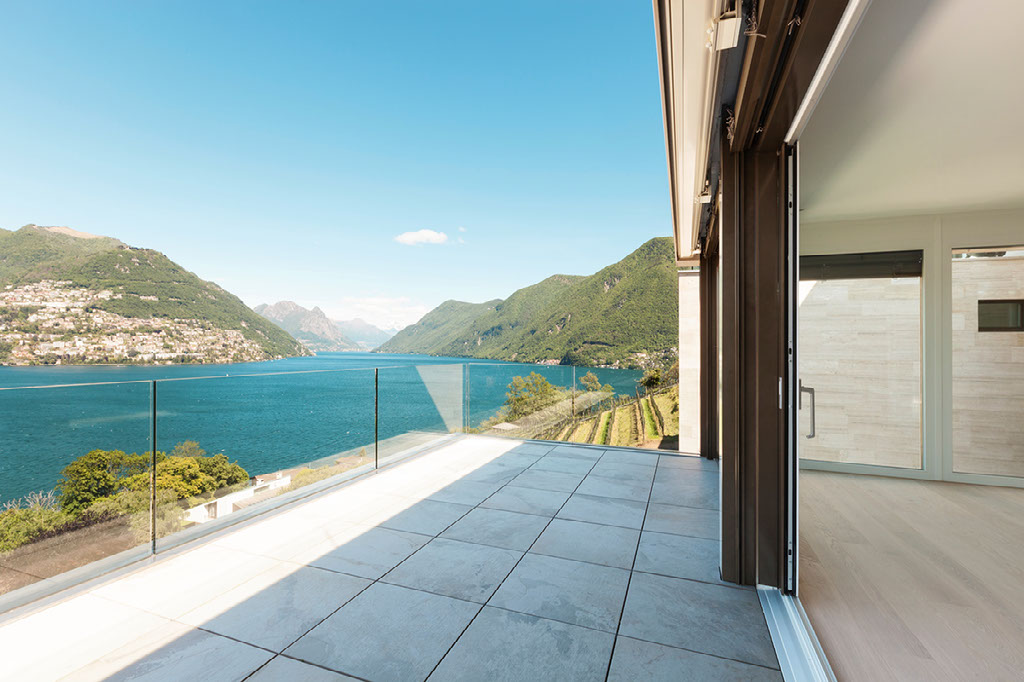
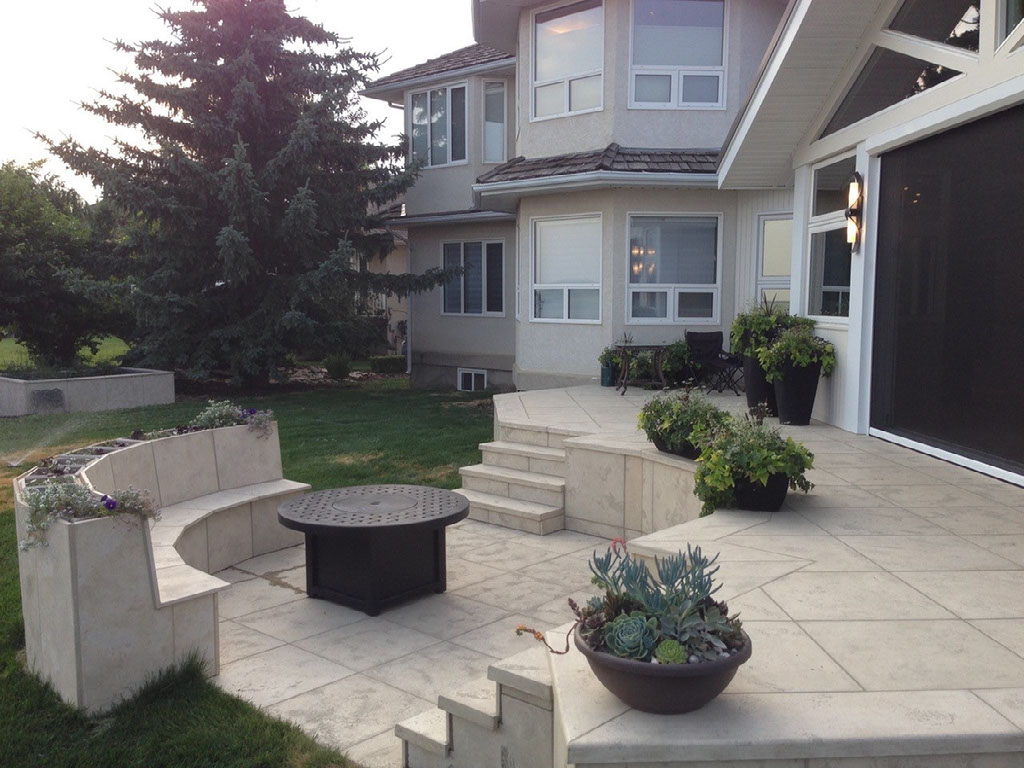
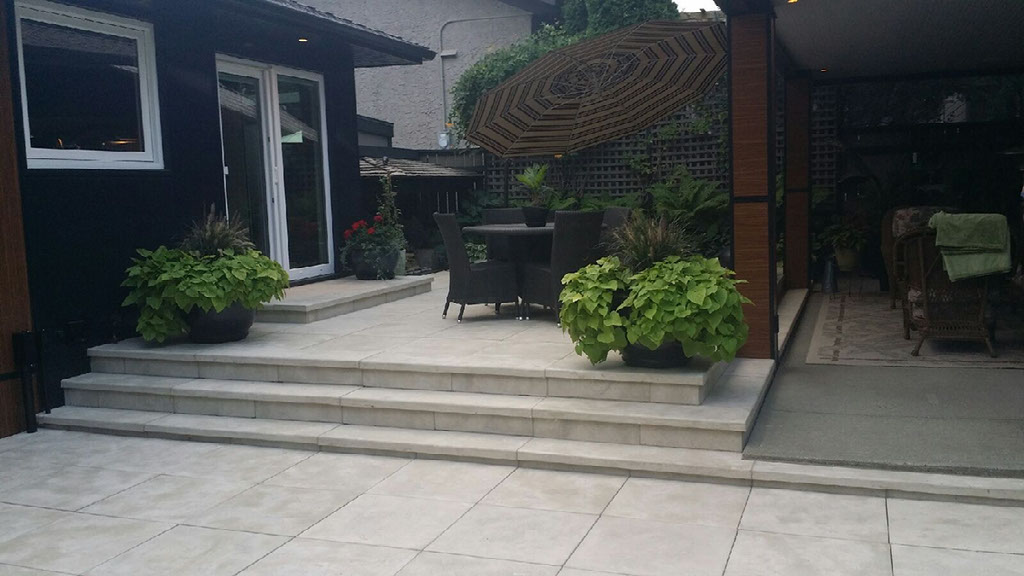
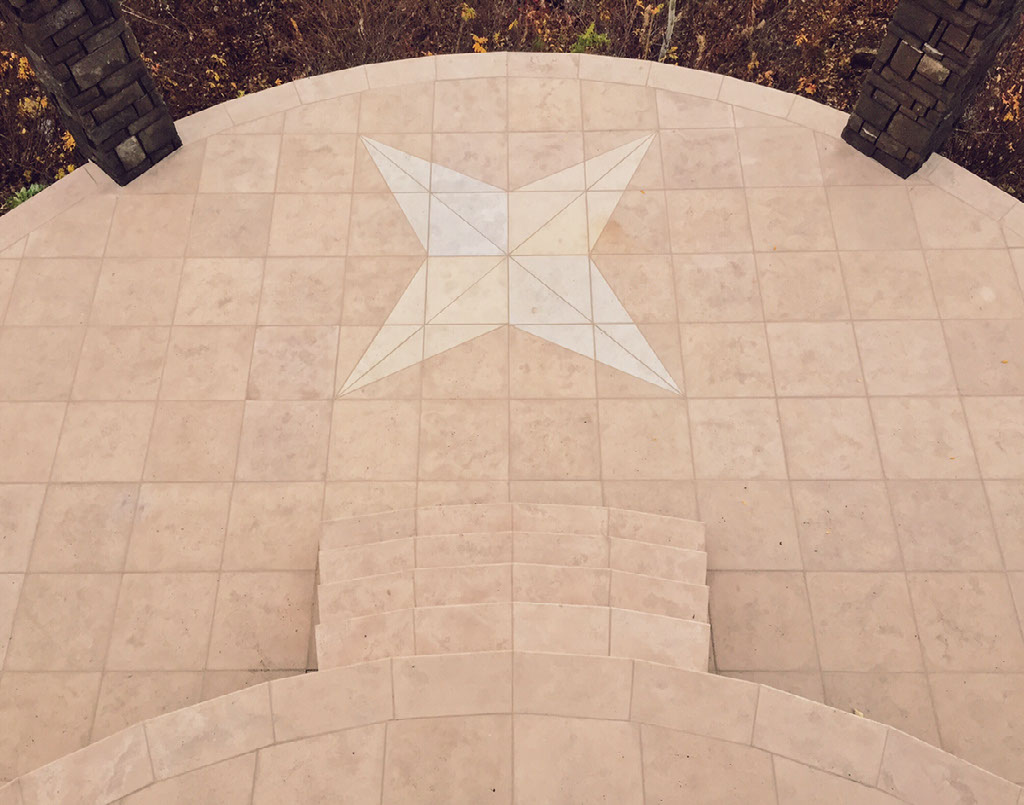
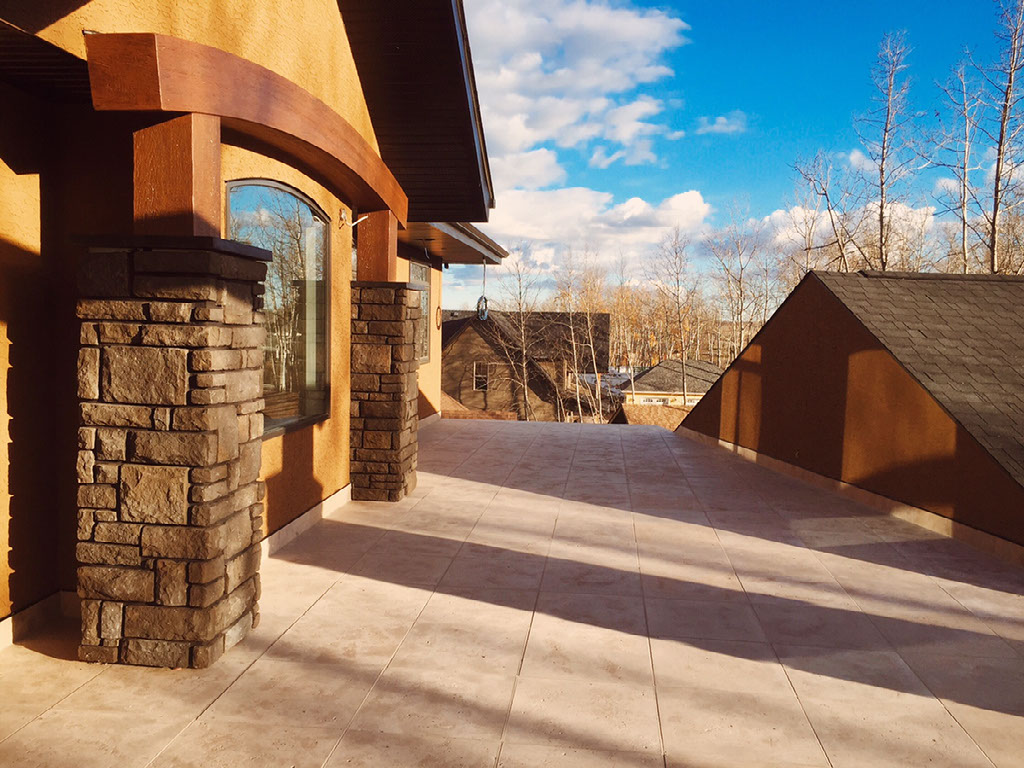
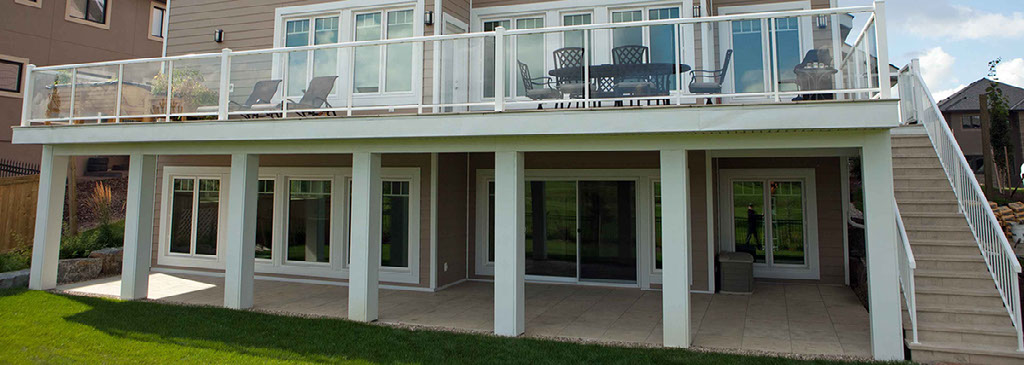
Finished IntegraStone decks


Curious to see how IntegraStone can work on your project?
Give us a call at 888-212-4964 or email us at info@integrastone.com