This pattern for crocheting clear lined diamonds was born as a consequence for my love and journeys to the wonderful city of Copenhagen in Denmark. I started wondering how to crochet diamonds with clear lines and to be able to crochet flat pieces like a rug back in 2013. After many attempts, one boring Sunday in 2014 I happened to take a look at a crocheted piece I had crocheted with half trebles (with UK terms) or half double crochets (with US terms). It made me understand that I would get very clear lines with this stitch. With this same technique, you can also crochet other patterns with lines going upward and downward / or \. In my blog www.pirjoriittam.blogspot.com and on my Instagram account you can see various patterns and pieces I have made with this technique. So far I have made rugs, IPad sleeves, pillow cases, scarves, bracelets and pouches with this technique. The patterns vary from triangles to patterns inspired by Moroccan rugs. Hope you like the technique as well and have use for it! And most of all, have fun crocheting!
Some general instructions
- In this tapestry crochet technique you work back and forth normally on both sides and all the stitches are crocheted into the both loops – just as you would do when crocheting any other piece with one colour. Crocheting the right side of the work and the wrong side of the work are counted as separate rows (=2 rows).
- Diamonds are crocheted with half double crochets and widening the diamond and decreasing it are made one stitch at a time each row with changing the colour - 1, 2, 3, 4 etc.
- Right-handed crocheters widen the diamond on the right side of the motif/diamond and left-handed on the left side of the motif. When it is time to start to decrease the motif, right-handed crocheters do that on the left side of the diamond motif and left-handed on the right side. This is explained more thoroughly in the pattern itself.
- When crocheting tapestry crochet, you carry along the other yarn inside the stitch. When switching colour, make the final yarn over with the new colour. If you are not familiar with the basic technique, look for example Carol Ventura’s instructions. I have made my own alterations to the basic technique though. Firstly, I use hdc:s. For the second, when you have changed to a new colour on the wrong side of the work, make the first hdc without carrying the other yarn inside the work (this is explained more thoroughly in the pattern itself as well). This trick gives the motif clearer lines.
- I usually only work with two colours at the same time as then there is less trouble when carrying the other yarn inside the work and the yarns don't get so tangled to each other.
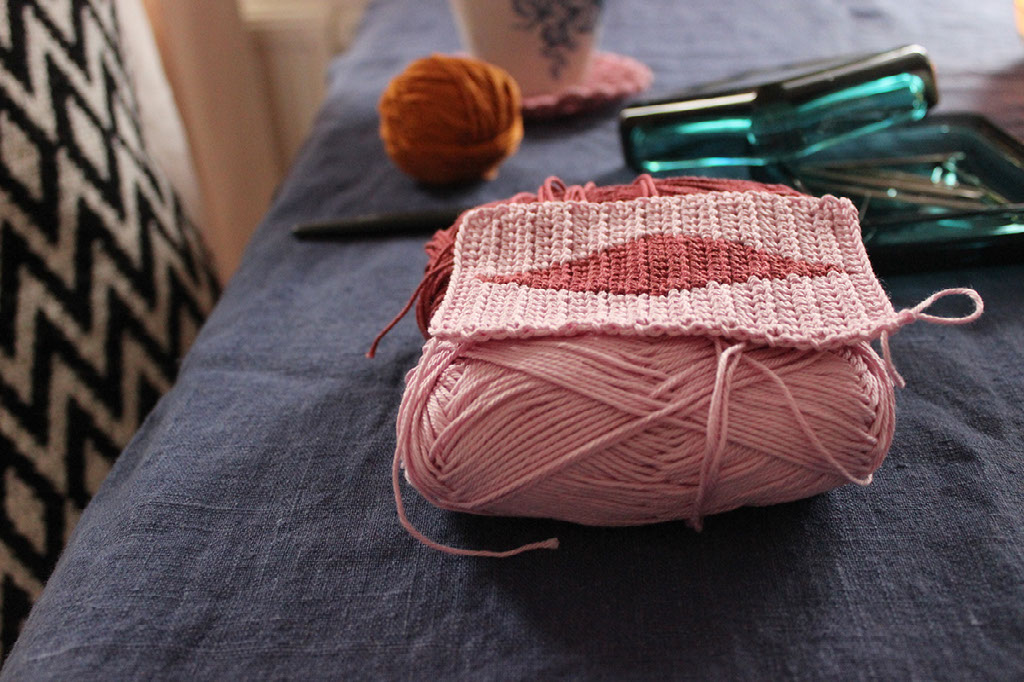
- Diamond in this basic pattern is crocheted with Schachenmayr Catania –yarn (mercerized cotton thread) and a hook size 2,5. You can easily use whatever yarn or thread you happen to have (some ”sticky” yarns, like alpaca, are more difficult to work with, even though they are often gorgeous yarns). When it comes to international yarn brands, I have crocheted diamond motifs with for example Sirdar cotton yarn and Drops Cotton Time with hook size 3 and Sandnes Midi with hook size 3,5 as well as Lang Yarns Quattro with hook size 2, 5.
Abbreviations (I have used US terms in the description)
- ch chain stitch
- hdc half double crochet (half treble in UK)
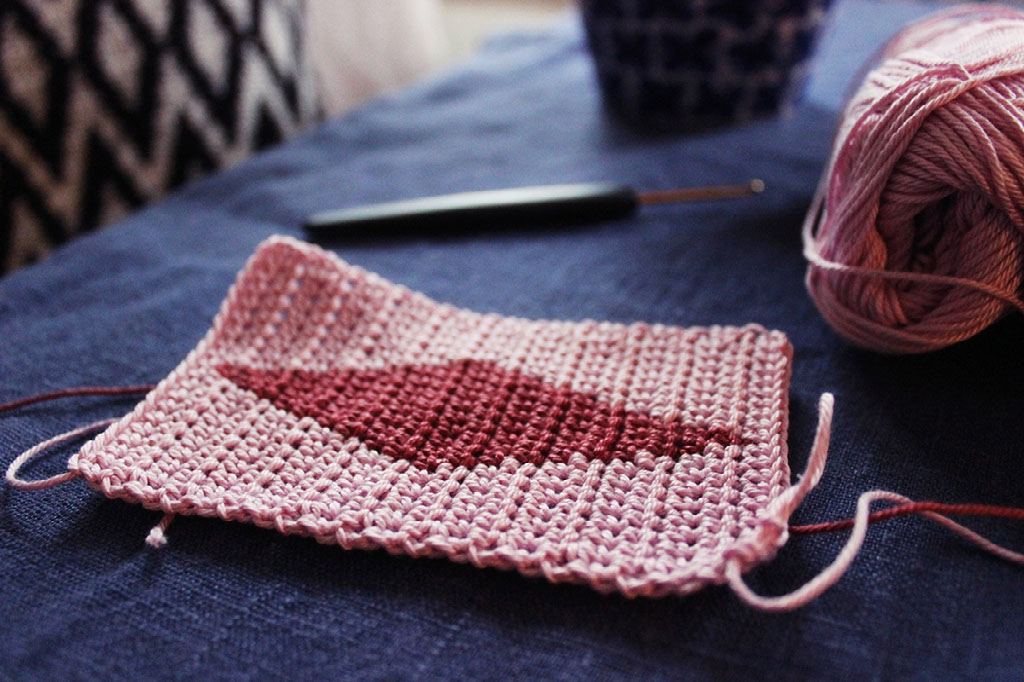
I have used the terms background colour (= bg colour, pale pink in the pictures) and motif colour (burgundy in the pictures) in this pattern. When I talk about widening and decreasing the motif in the pattern, I mean widening and decreasing of the motif colour to the next stitch. You should all the time have 19 stitches in your work and these are not added or decreased.
Edges
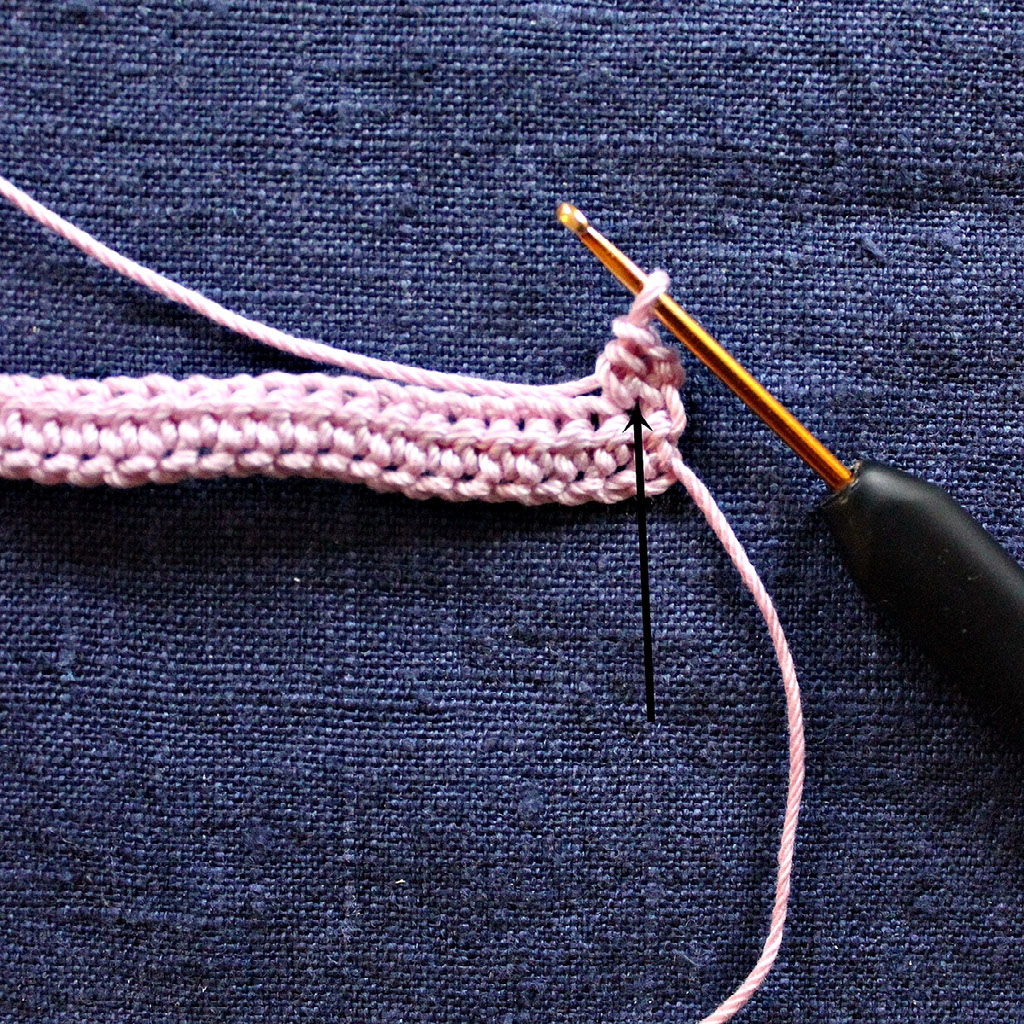
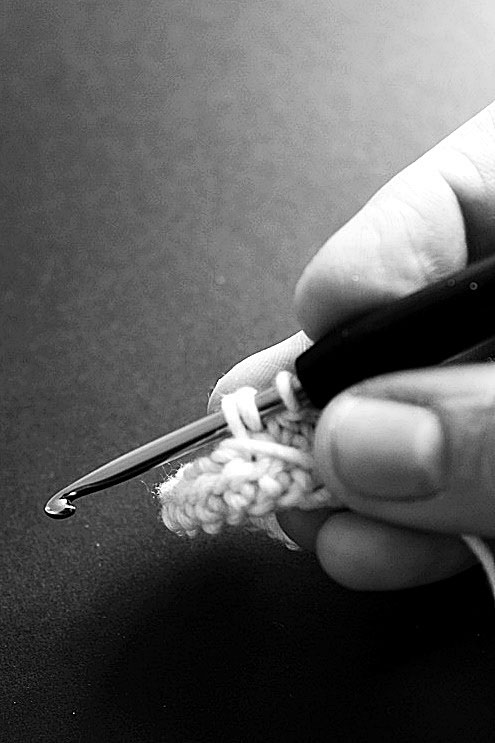
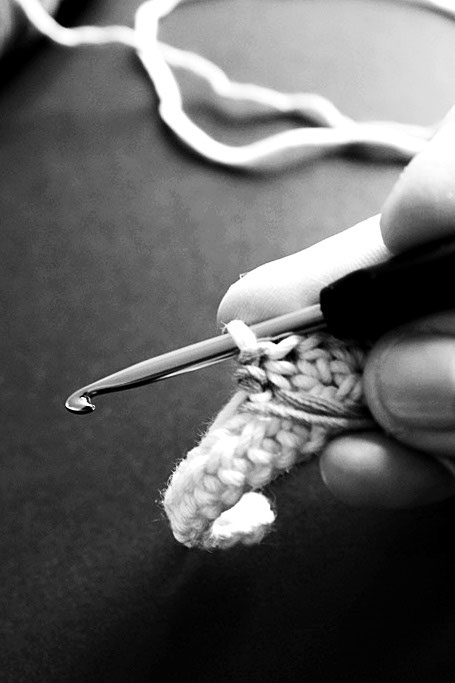
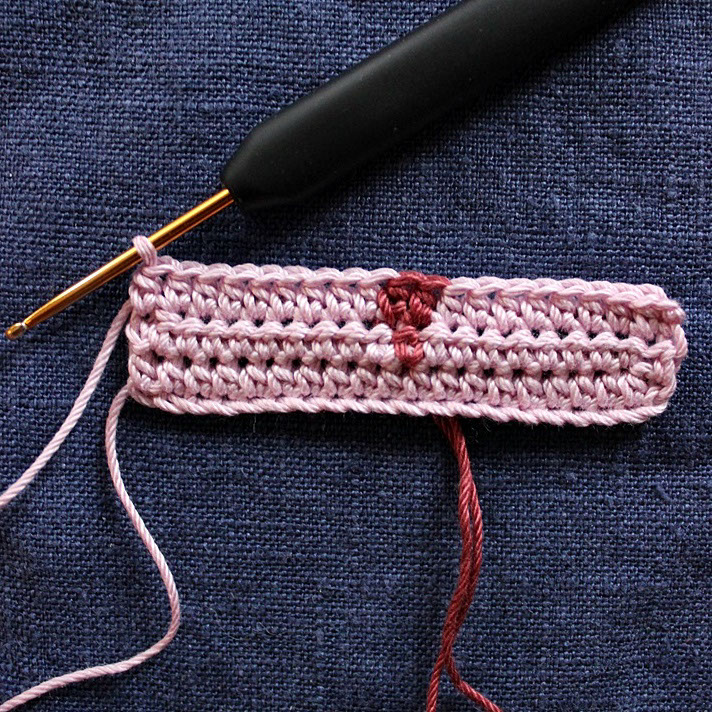
When it comes to achieving neat edges, I have the habit of crocheting one hdc into the same stitch as ch 2 at the beginning of each row (see the first picture below). At the end of the row I jump over the last hdc of the row and make the last hdc to ch 2 of the previous row (see the second picture below). I think this way the edges are quite even and beautiful.
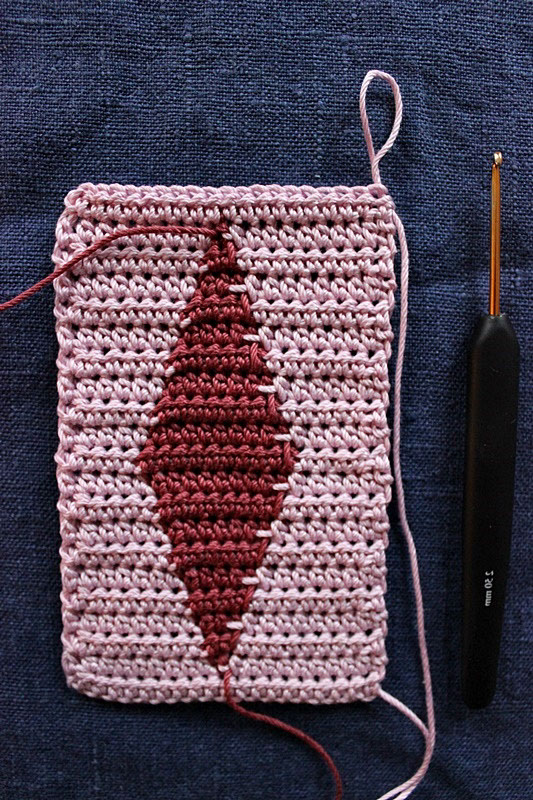
When crocheting only one single motif I don’t usually carry yarn inside the work during the whole row, but leave it where the motif begins for the next row (as you can for example see in the second picture below).
Pattern
1. Ch 21. (= 19 stitches + 2 ch to turn around)
2. (rs=right side of the work) Crochet 1 hdc into the third stitch from the hook and after that 1 hdc into each stitch with the background colour. (= 19 stitches, the first hdc which consists of ch 2 is not counted as 1 hdc). Ch 2 and turn the work.
3. (ws=wrong side of the work) Crochet 8 hdc with the background colour and make the colour change in the 9th stitch by crocheting the last yarn over with the motif colour. Below in the first picture on the left side you see how I usually hold the background colour when introducing a new yarn on the wrong side. Crochet 1 hdc with the motif colour, but make the last yarn over of the stitch with the background colour, see the second picture below. Remember also to leave the yarn of the motif colour to this (wrong) side of the work. Crochet 9 hdc with the background colour and ch 2 at the end of the row and turn the work.
4. (rs) Crochet 7 hdc with the bg colour. Crochet the 8th hdc with the same colour as well, but switch colour by making the last yarn over with the motif colour (see the first picture below). Crochet 2 hdc with the motif colour and carry along the bg colour during both stitches. When crocheting the motif on the right side of the work, I always carry the bg colour inside the work during all the stitches of the motif. Change the colour back to bg colour by crocheting the last yarn over of the second hdc with the bg colour. Crochet 9 hdc with the bg colour and end the row with ch 2 (see the second picture below).
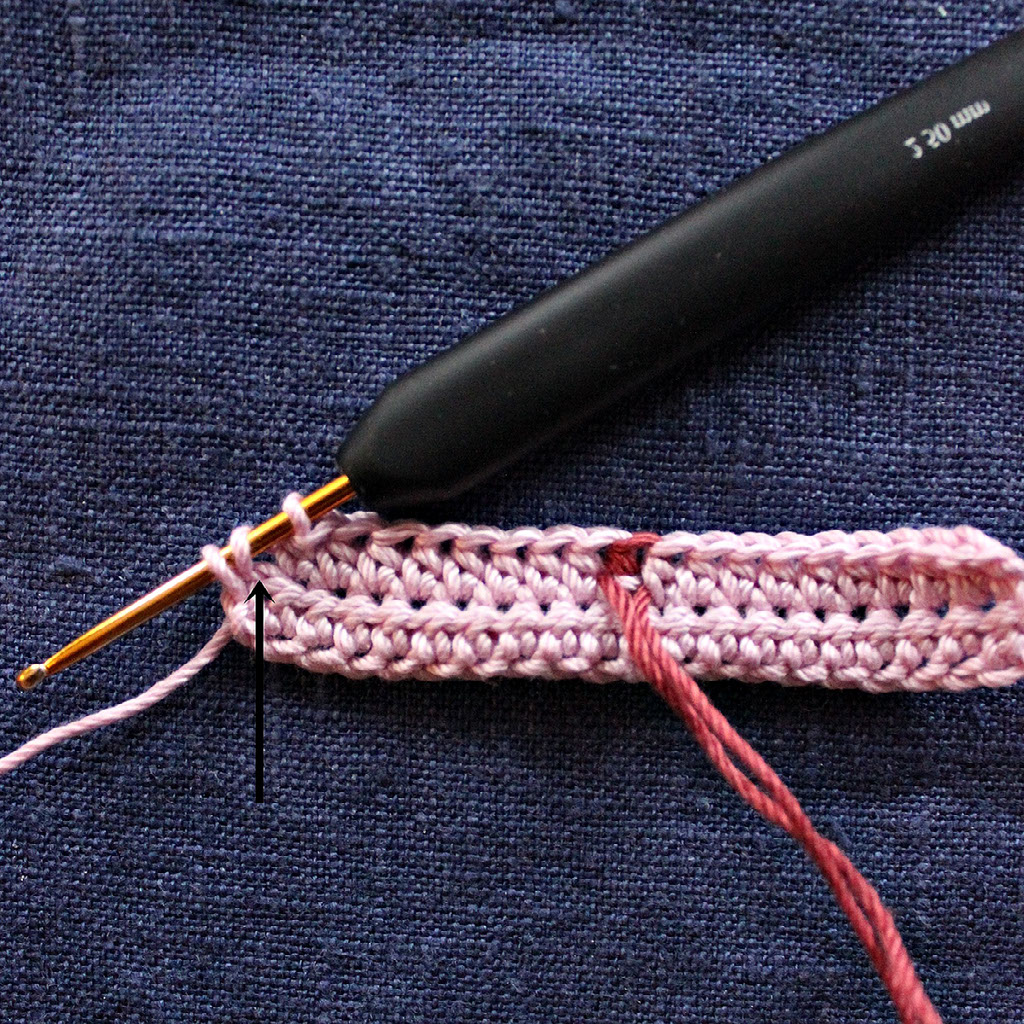
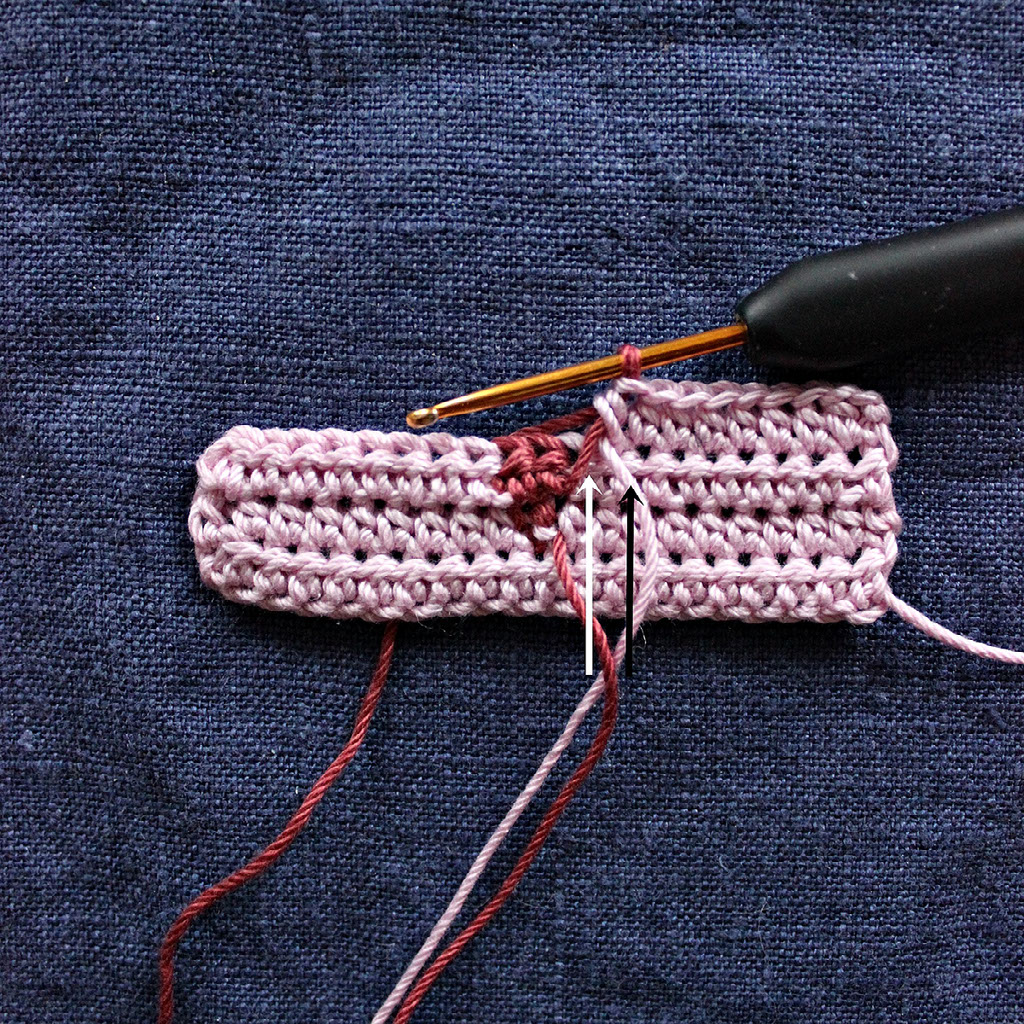
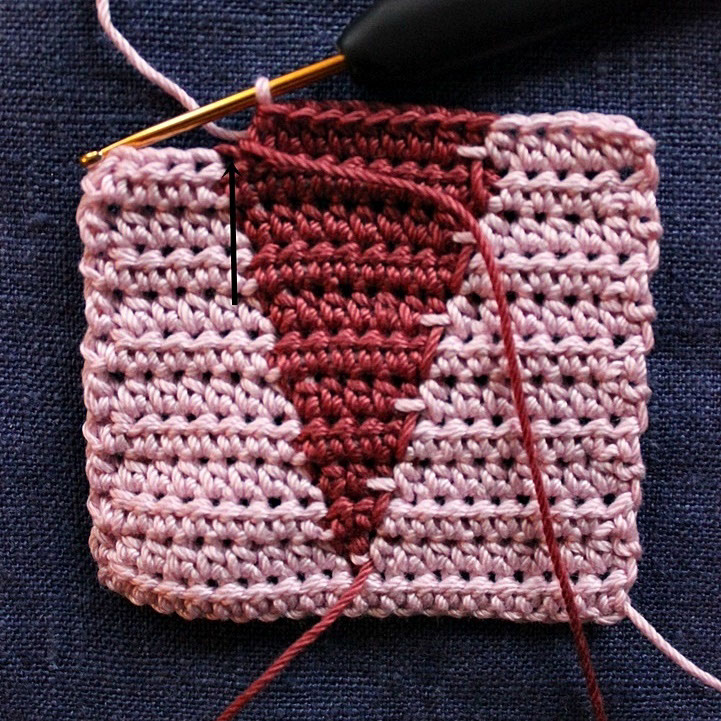
5. (ws) Crochet 7 hdc with the bg colour. Crochet 8th hdc with the same colour as well, but make the last yarn over with the motif colour as before (look at the pictures below). So, remember to lift the yarn of the bg colour to the wrong side of the work before taking the motif colour onto your hook. Do the same when crocheting other rows on the wrong side later. Take a look at the first picture below. A black arrow is pointing to this yarn and a white arrow to the motif colour.
The first stitch with the motif colour on the wrong side is always crocheted without carrying the other yarn inside the work. And after finishing the first stitch with motif colour I have the habit of pulling the yarn of the bg colour before starting to carry it inside the work. This makes the motif more clear-lined. Crochet 2 hdc with motif colour and carry along the bg colour inside the work, but remember to make the last yarn over of the 2nd hdc with the bg colour. Crochet the rest of stitches with the bg colour as before and end the row with ch 2. The motif is now 3 stitches wide.
6. (rs) Crochet 7 hdc with the bg colour, 4 hdc with the motif colour and 8 hdc with the background colour again. When crocheting the 7th hdc of the row, remember to make the last yarn over with the motif colour. When going back to the background colour after 4 hdc, remember to make the last yarn over of the 4th hdc with the background colour. Carry the background colour along (during the 4 stitches of the motif) as during the 2nd round. End the row with ch 2.
7. (ws) Crochet 7 hdc with the bg colour, 5 hdc with the motif colour and 7 hdc with the bg colour again. Below you see again the colour switch from the bg colour to the motif colour when crocheting the 7th hdc of the row. Remember to lift the bg colour to this wrong side of the work, take the motif colour onto your hook and make the last yarn over with it. Crochet 1 hdc with the motif colour without carrying the bg colour and start carrying it with you when making the next hdc. Crochet 3 more hdc with the motif colour, but remember to make the last yarn over of the 5th hdc with the bg colour to switch the colour as always. End the row as before.
When the motif is getting wider, I also tend to stretch the crocheted piece sideways before changing back to the background colour in order to make sure that the yarn traveling inside stitches is not too tight.
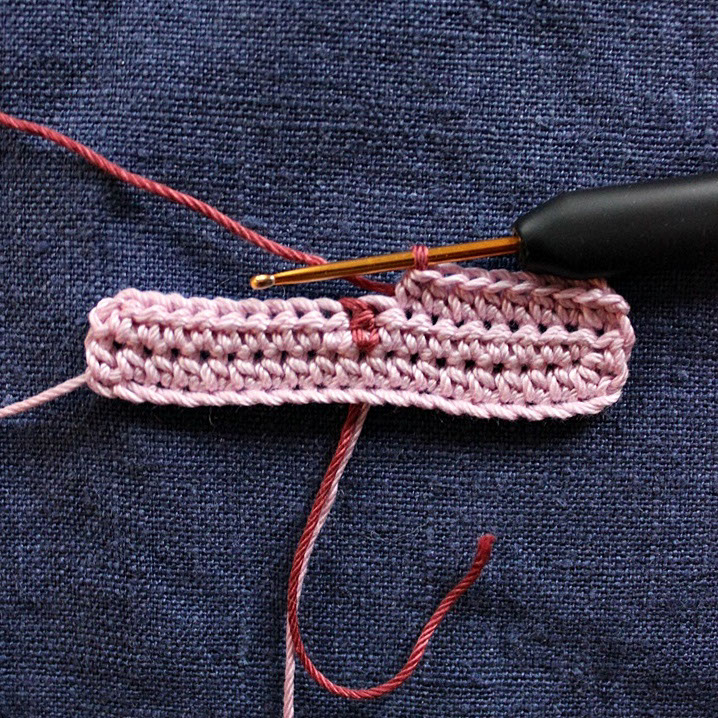
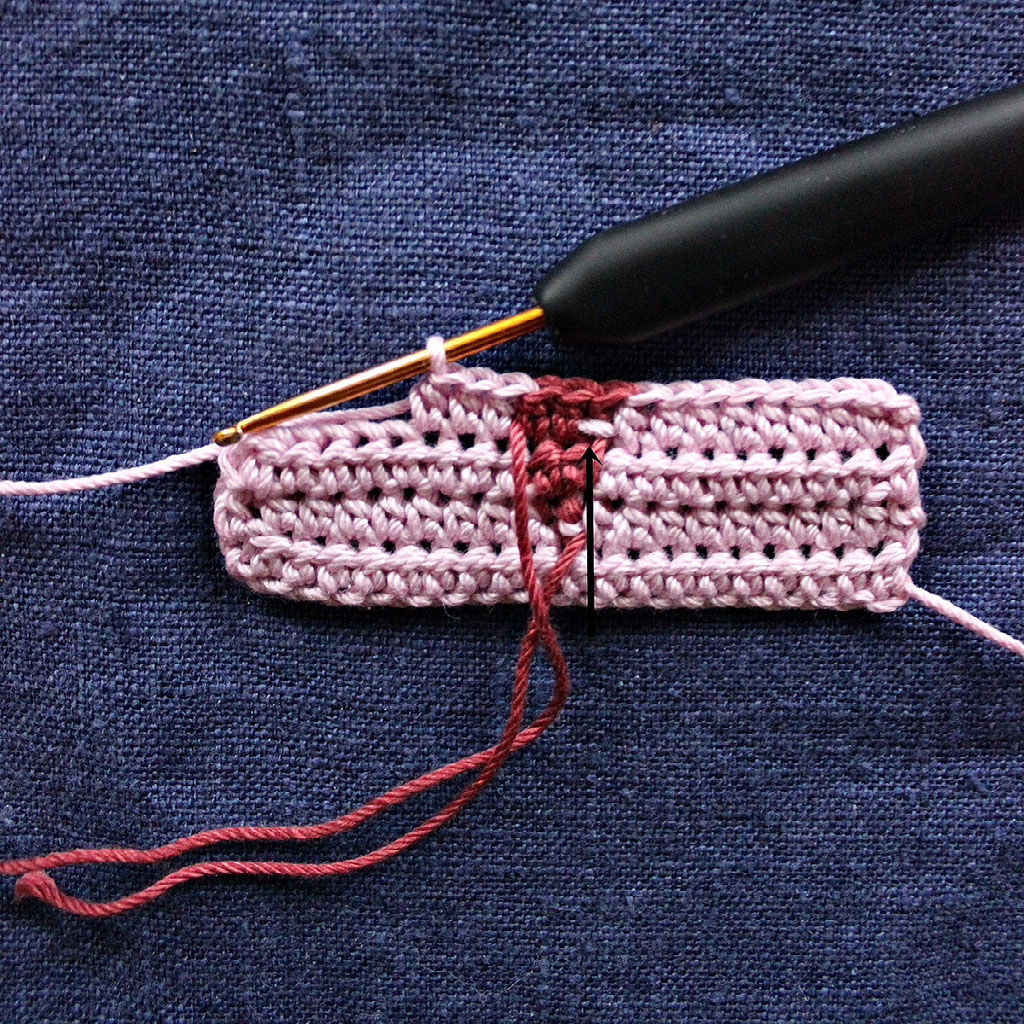
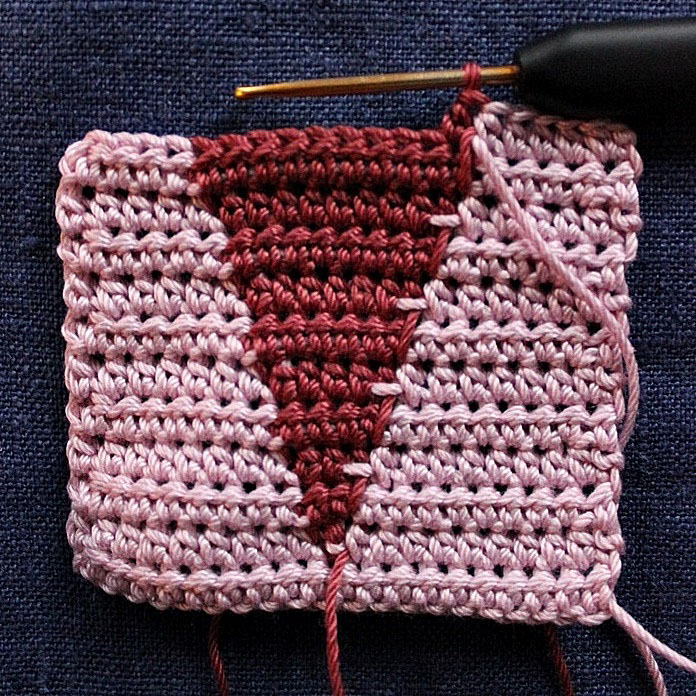
13. (ws) During this row you start to decrease the width of the diamond motif. It is made in the same way as widening the motif. During each row you decrease the motif by one stitch. Crochet 5 hdc with the bg colour, 9 hdc with the motif colour and 5 hdc with the bg colour. Have a look at the pictures below.
So, the general rule for decreasing is to crochet the first hdc with the motif colour to the same stitch which was made with the motif colour during the last round (look at the picture below in the middle). On the left side of the motif, you make the actual decreasing, and the last stitch which was made with the motif colour during the last row is now crocheted with the bg colour.
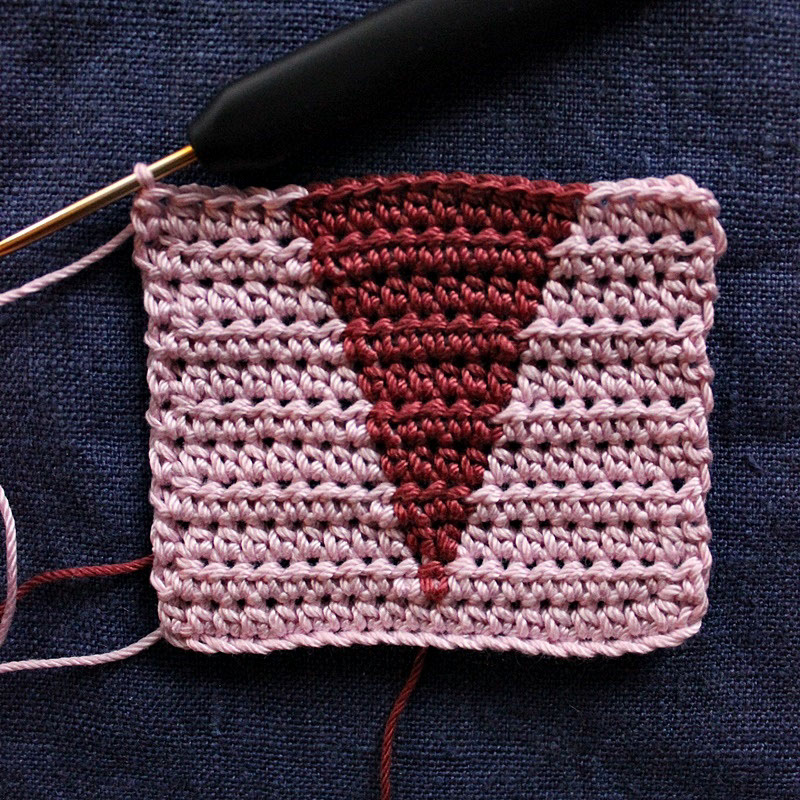
14.-21. Continue as before and decrease the motif by one stitch each row according the chart.
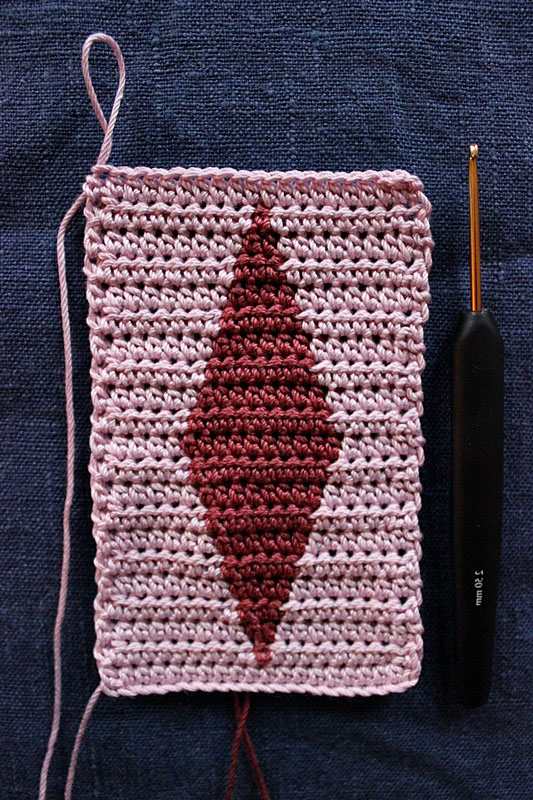
22. Crochet 1 row with bg colour. Cut the yarn and weave in the ends. Your first diamond is now finished!
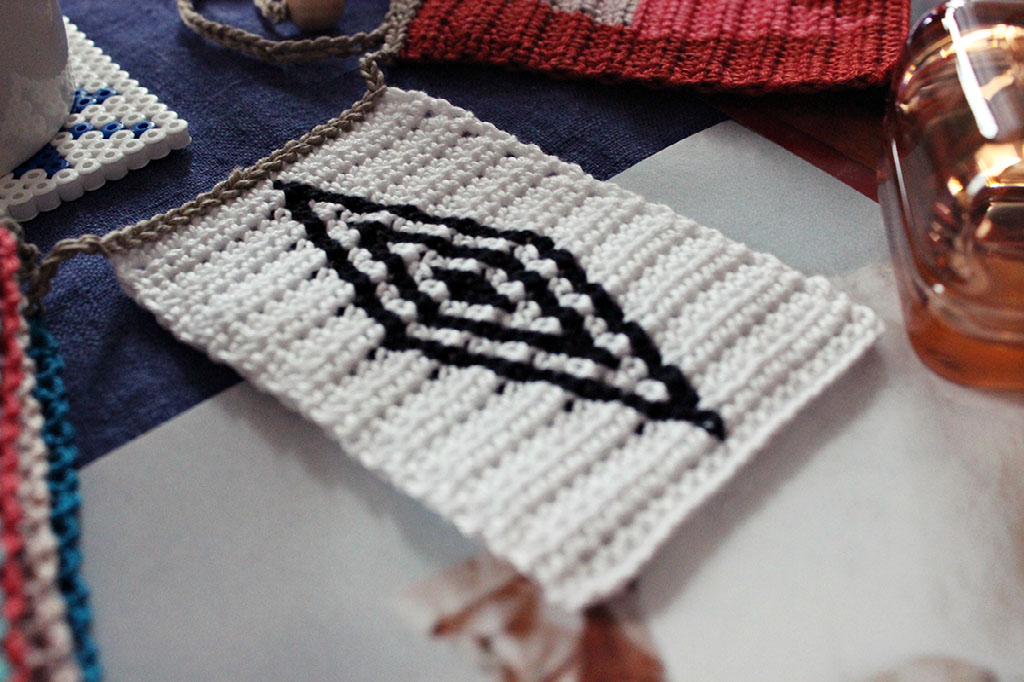
And after finishing your diamond you may want to try some other variations of the basic pattern. I decided to make a bunting of my different diamonds and I really like it.
You may reproduce this pattern and design your own patterns with this tapestry crochet technique for private use. Regarding commercial use, please contact me first.
Greetings from Finland!
Pirjo, e-mail: pirjonpuuhastelut (at) gmail.com